Let’s look at a simple example issue from a Laravel project:
Issue #3: For admin users, show a Dashboard at '/admin' and display the number of Stamps
It is very short and simple. Maybe it is the first issue, and other issues build on it? Maybe there are issues #4, #5 and #6 that add more data to the dashboard?
Maybe the developers created this issue when they broke up a longer user story into smaller pieces.
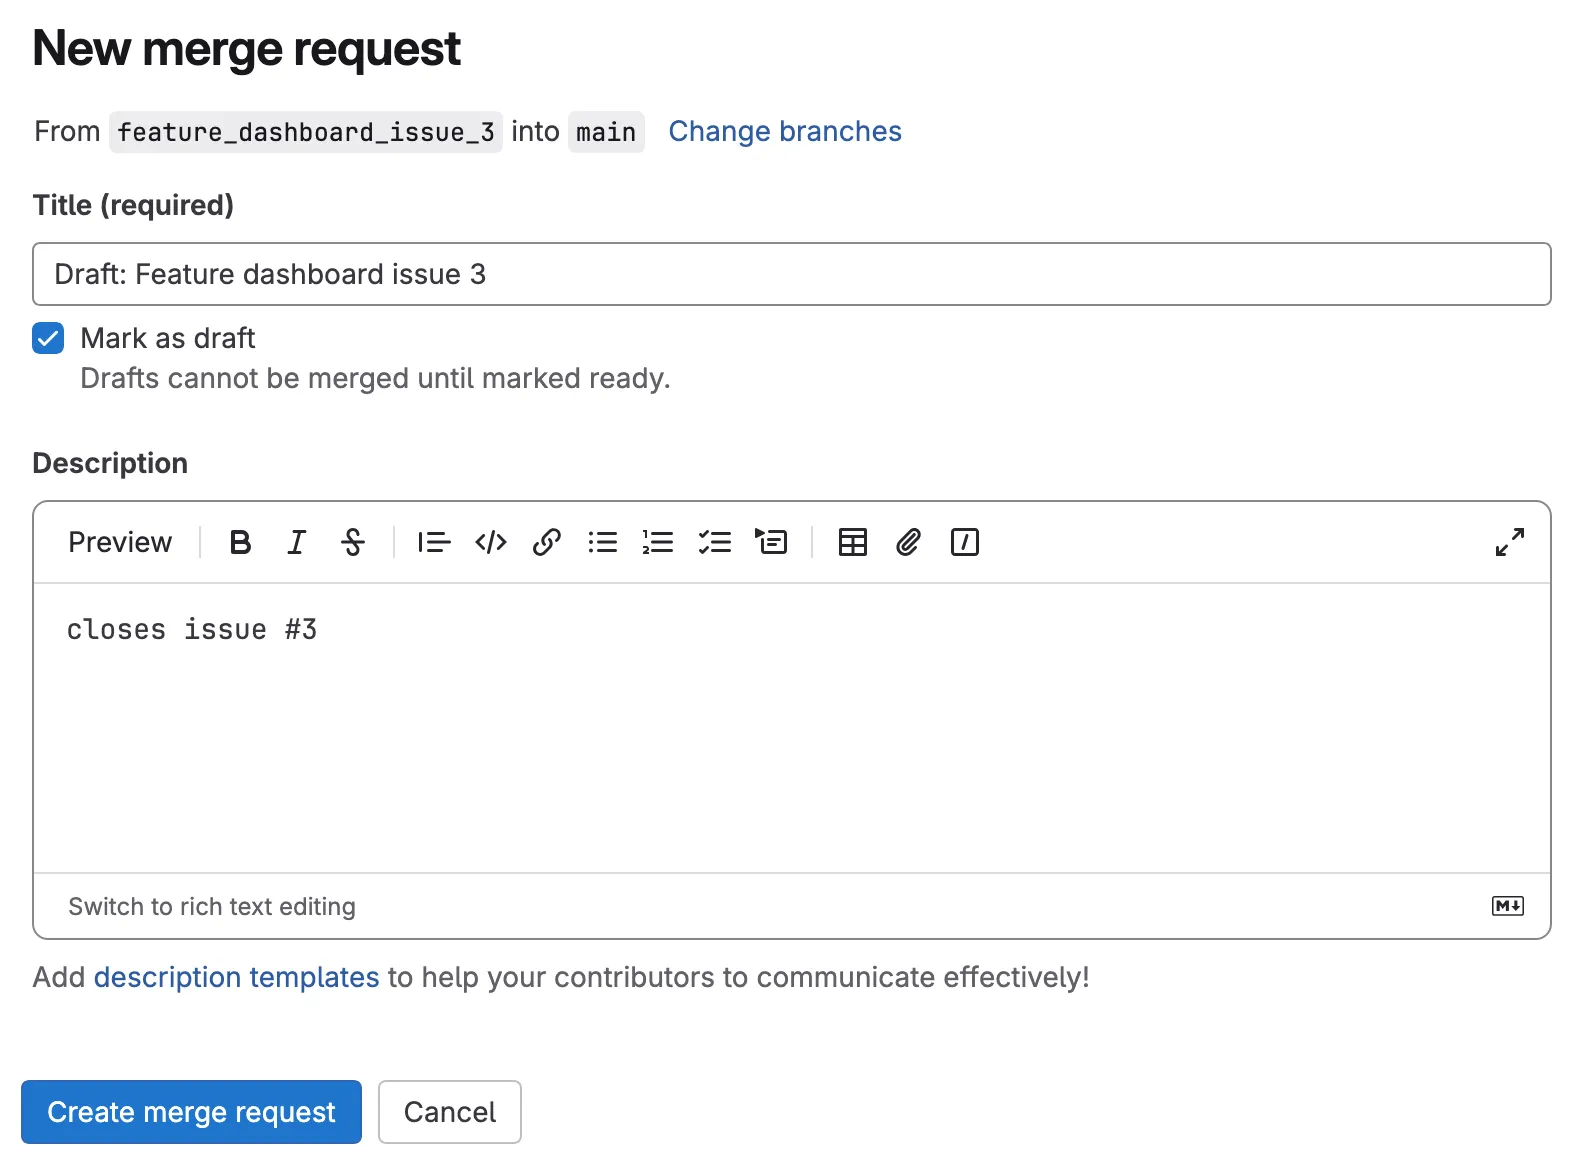
The merge request compares your feature branch to the main branch. You can add commits now or later on - the merge request will always show the latest version.
When we zoom in on step 2, “the issue is implemented”, we find the cycle of test driven development (TDD): we write the test first, and then the code. For an issue that delivers value to the user, we start with feature tests:
break the issue up into a list of possible feature tests - but don’t implement anything yet
write the simplest feature test from your list. If you run your test suite now, the new test fails: it is “red”
implement just enough to make the new test (and all the existing tests) pass: they are “green”
commit and push
refactor if you think it’s necessary. all the tests still pass.
commit and push
are you done with the whole issue? if not go back to step 1
Let’s look for a place to put the feature test. Take a look at the files tests/Feature/*Test.php.
Maybe we should create a new test file for the Dashboard. There is a generator that could do that:
php artisan make:test AdminDashboardTest
This creates the file tests/Feature/AdminDashboardTest.php with an example test in it.
Or you could copy an existing file with feature tests, and use the existing code as inspiration.
The dashboard is only meant for admin users. In this project, these are the users with the status STAFF.
So our test logs in as a staff member with actingAs() before it requests the page:
To get a feature test to pass, we sometimes need to build a new web page, or a new view in an MVC system. Then it makes sense to switch to “browser driven development”: you reload the page in the browser after every small step, and the next error message tells you what to do next.
By using the browser in every step, we make sure that all the parts of the system fit together. Finally we reach a stage where the feature test passes.
This also works for new REST API endpoints. There, the goal is to see the right JSON output in the browser instead of a web page.
Open the (new) URL ‘/admin’ in the browser. You see the first error:
404 Not Found
Laravel does not tell us more here: there is simply no route for this URL.
To define the missing route, we edit the file routes/web.php. Read the existing routes and find a good place for the new route.
The admin page is not connected to one specific model, so it does not belong in a resource controller like the EventController.
We will use a new PageController for pages like this:
To get a feature test to pass, we sometimes need to add code to several classes. In this case it makes sense to do an “inner cycle” of TDD. It works like the TDD cycle with feature tests, but this time we write unit tests:
Think of all the parts you might need to fulfill the feature test, and how you would test each of them - but don’t implement anything yet
pick the simplest part, and the simplest unit test for it, and write that unit test. (red)
implement it (green)
commit and push
refactor if you think it’s necessary. all the tests still pass.
do you have all the pieces needed to get the feature test to pass? if not, go back to 1
In this “inner cycle” you build one piece after the other, until you have everything the feature test needs.
The project contains a model Stamp. So we could use Eloquent
to count the number of stamps: Stamp::count().
Be careful not to write Stamp::all()->count(): that gives the same number,
but it loads every single stamp from the database into PHP, and then counts them in PHP.
Stamp::count() lets the database do the counting with SELECT COUNT(*).
We could put this code into the view:
<h1>Admin Dashboard</h1>
<p>{{ \App\Models\Stamp::count() }} stamps in total.</p>
Or we could put the code in the controller, and then display it in the view:
classPageControllerextendsController
{
publicfunctionadmin():View
{
$numberOfStamps=Stamp::count();
returnview('admin',compact('numberOfStamps'));
}
}
or we could put the code in the Stamp model, and just call a method in the controller:
classPageControllerextendsController
{
publicfunctionadmin():View
{
$numberOfStamps=Stamp::totalNumber();
returnview('admin',compact('numberOfStamps'));
}
}
The last version is best: the Stamp model should contain the business logic of stamps. Right now the logic is simple. But later there could be stamps that are not approved yet, and should not be counted. Or there could be stamps that are invalid or outdated. Deciding which stamps count is business logic, so it belongs in the model.
Let’s write a unit test for the method of the Stamp model.
If the project already has a file tests/Unit/Models/StampTest.php, we can just add a new test case there.
Otherwise we create it with:
php artisan make:test Models/StampTest --unit
This unit test needs the database. In a new Laravel app the tests in tests/Unit do not start
Laravel, so they cannot use the database or factories.
Check tests/Pest.php: 'Unit' has to be in the list of folders that use the TestCase
(see The Test Environment).
// file tests/Unit/Models/StampTest.php
use App\Models\Stamp;
it('knows how many stamps there are in total',function(){
expect(Stamp::totalNumber())->toBe(0);
});
This test expects that there are no stamps at all.
That is correct: the test database is empty at the start of every single test.
RefreshDatabase runs the migrations once, and then wraps every test in a database
transaction that is rolled back at the end of the test.
So whatever one test creates or deletes, the next test starts with an empty database again.
We can improve our test: it creates a new stamp with the factory, and checks that it is counted.
The factory also creates the user and the event the stamp belongs to:
it('knows how many stamps there are in total',function(){
expect(Stamp::totalNumber())->toBe(0);
Stamp::factory()->create();
expect(Stamp::totalNumber())->toBe(1);
});
When we run this test in the terminal now, it is red:
FAILED Tests\Unit\Models\StampTest > it knows how many stamps there are in total
BadMethodCallException
Call to undefined method App\Models\Stamp::totalNumber()
Now we go back up to the feature test level, where the
test is still red. To display the result of our method,
we still have to call the method in the controller, hand the value to the view,
and then display the value in the view:
Let’s look at what happens after Test Driven Development: all feature tests pass, and all commits have been pushed to the merge request. So we have now reached step 3:
after picking the issue, the developer creates a feature branch and a merge request. The merge request is set to “draft” status.
then the issue is implemented (we zoomed in on this step above)
when the developer thinks the implementation is done, they remove the “draft” status
now another developer does a code review
if changes are needed, we go back to step 2.
now the feature branch can be deployed to the staging server, where it is available for manual testing.
if problems are found in manual testing, we go back to step 2.
if the implementation is accepted, the feature branch can be merged and deployed to production
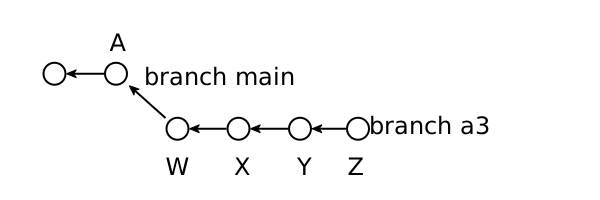
In a large team, many feature branches are open in parallel. When you start your feature branch (called “a3” in this diagram), it is up to date with main. You start working, and add commits to your own branch:
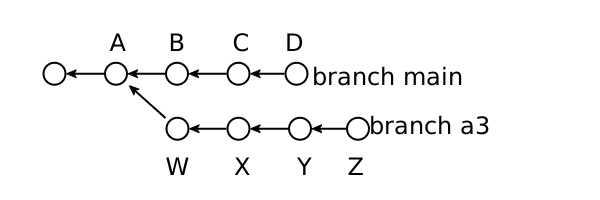
When you are ready to merge, main might have moved on: other features were finished and merged into main, so main now has new commits:
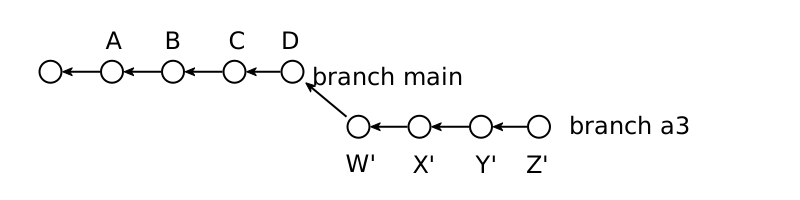
In this case you need to rebase your branch:
Terminal window
gitcheckouta3
gitpullorigina3# most current version of your feature branch
gitrebasemain
# fix problems, run the tests, fix problems again
gitpush--force-with-leaseorigina3# overwrite branch with rebased branch
# work on your merge request
Rebasing rewrites your commits, so that they come after the new commits on main:
Now a different developer in our team does a code review. Git makes this easy: the reviewer sees just the changes we made, and does not have to search through the whole codebase.
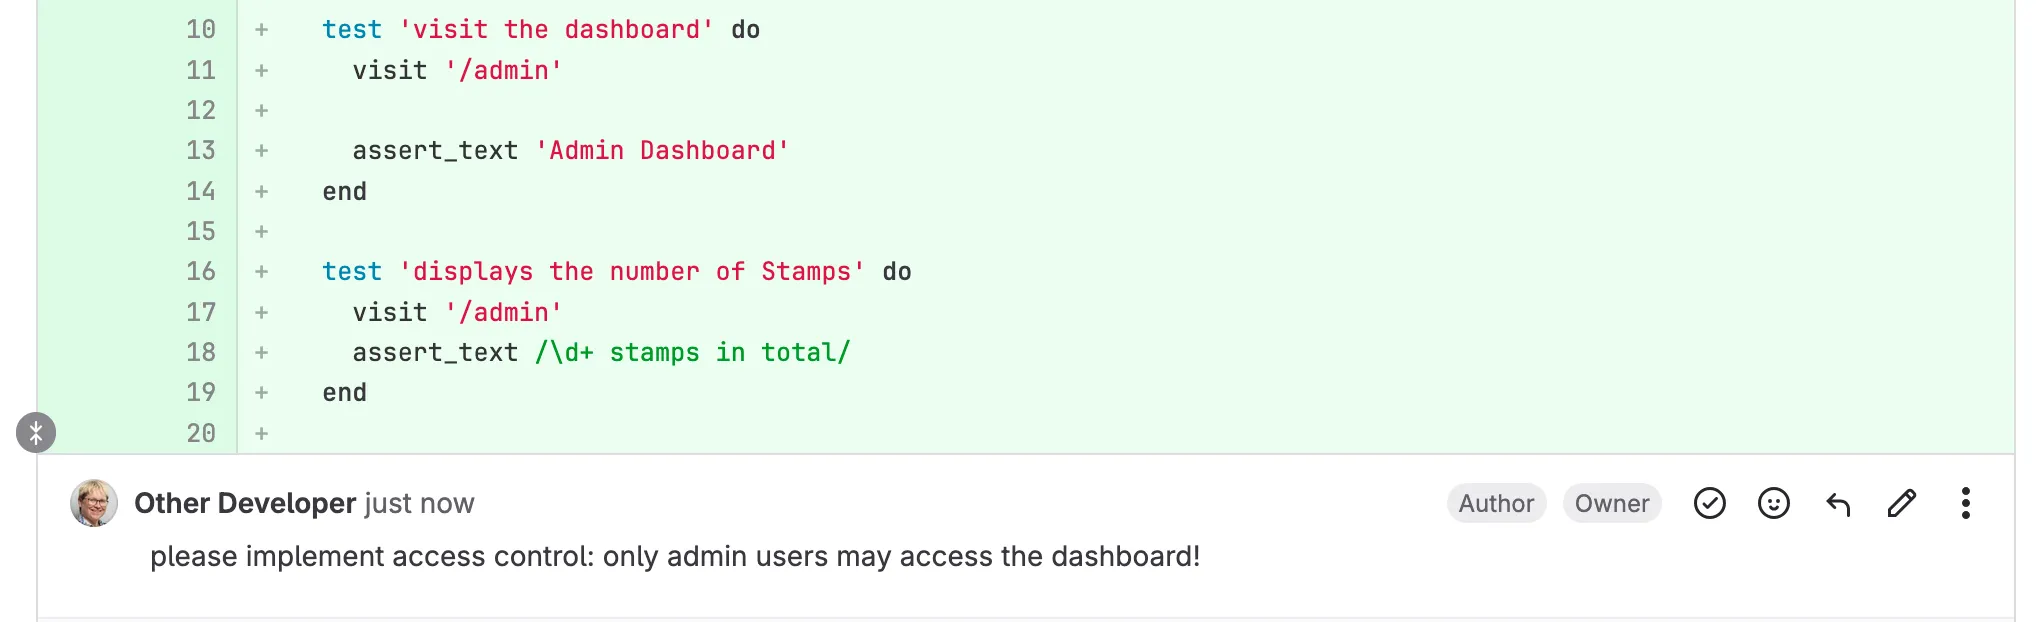
They can add comments directly in the code:
It seems we forgot to implement the first feature test on the list: only admin users may access the dashboard. Good that the code review caught it! Now we go back to the implementation to fix this.
After the successful code review, we are ready to deploy the feature branch to staging.
When using dokku, this is done with git on the command line:
git push dokku-staging feature_dashboard_issue_3
In the staging environment the feature can now be tested not just by developers, but also by other team members like designers or product owners, and by the customers.
This is a simple version of an iterative software development process.
When you work on an existing codebase, in a project that regularly deploys new features, you will use a variation of this process.
Each team and each company also has its own conventions and standards: for branch names, for commit messages, for how many tests a feature needs before it counts as finished, and so on.